How to - Bizhub Copier - Enable Account Tracking
- After the device drivers have been installed, create a new document in an application (MS Word, Pages, etc.).
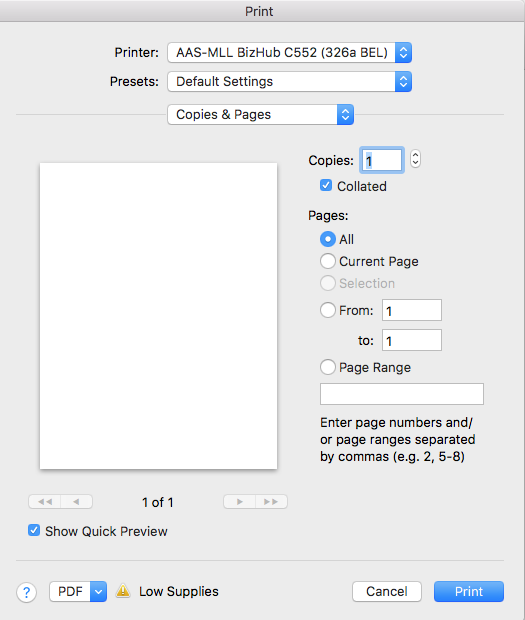
- Type in some text and go to Print (⌘+P) dialog.
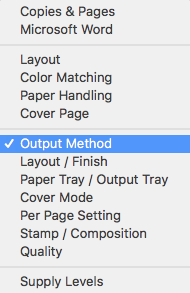
- Click the drop-down menu containing 'Copies & Pages' and select 'Output Method.'
- Click the Detail Settings... button.
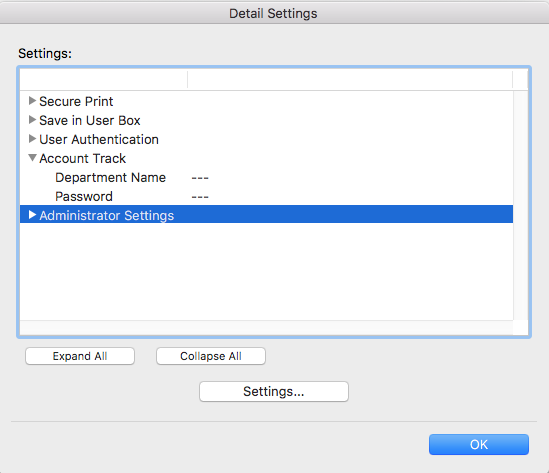
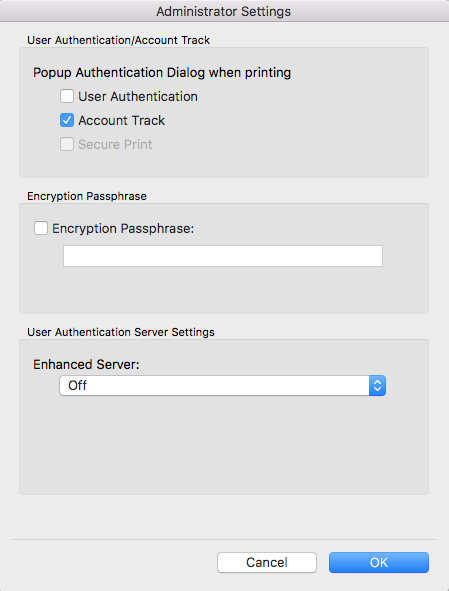
- First, you need to tell the driver that the system is using Account Tracking, click/expand the Administrator Settings.
- Click the Settings....
- Change Account Tracking to 'ON' or place a check in the 'Account Tracking' checkbox (depending on driver/OS X version).
- Click OK to bring you back to the Detail Settings menu.
- Click OK to bring you back to the Print menu.
- Click Print to bring up the pop-up menu and complete the test.
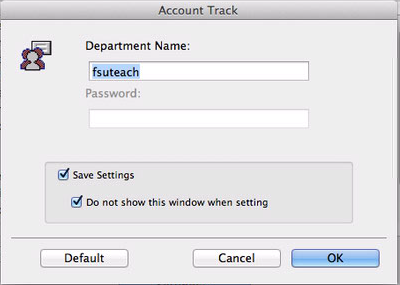
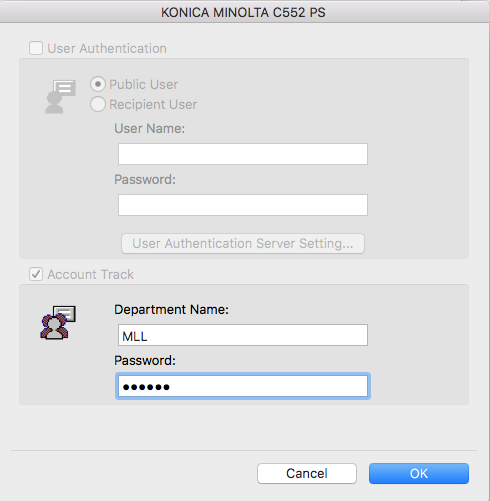
- You should see the following:
- Now (depending on driver/OS X version) enter as much information as you are able:
- Department Name: <your department>
- Password: <your account tracking password>
- NOTE: the account tracking password is not available for saving on all versions of the Konica Minolta printer driver/OS X version