FSU VPN Client Installation Instructions
(For Windows and Macintosh OS X Operating Systems only)
(ATTENTION: Links to Clients at Bottom of Page, if needed.)
VPN (Virtual Private Network) is basically a secure ‘tunnel’ through an active Internet Connection which in this case is from your home computer to the FSU VPN Server on campus. When your computer is connected to the VPN Server, it will be like your computer is on campus (through Comcast, CenturyLink, or any other Internet Service Provider).
This instructional video is designed to walk you through a basic setup of, connection to, and disconnecting from the FSU VPN client for Mac and Windows PCs. This client is basically a ‘dial-up’ style program where your computer will connect to the FSU VPN server upon successful authentication. You will need your FSUID username and password to authenticate to the FSU VPN server. If you do not have a FSUID or you do not remember your password, please visit http://fsuid.fsu.edu/ to create or reset your account. Should you have any problems with the FSUID webpage, please contact the University Helpdesk support at (850)644-4357 or help@fsu.edu.
AnyConnect Install/Connect/Disconnect Instructional Video (no sound):
AnyConnect General - step by step instructions:
1. Open your favorite Browser and navigate to https://vpn.fsu.edu
You will be redirected to a page that looks like this.

2. Enter your FSU ID (email without the @fsu.edu) and Password.
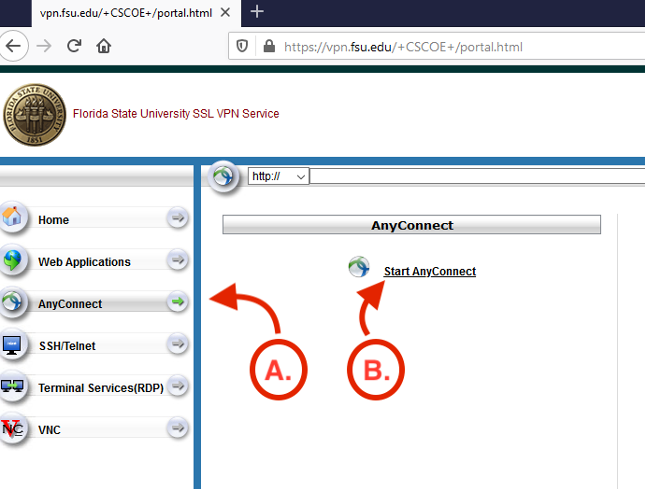
3. You will be directed to this page.
- Select AnyConnect on the Left-Hand Column.
- The Right side will change to match the Picture below. Select Start AnyConnect.
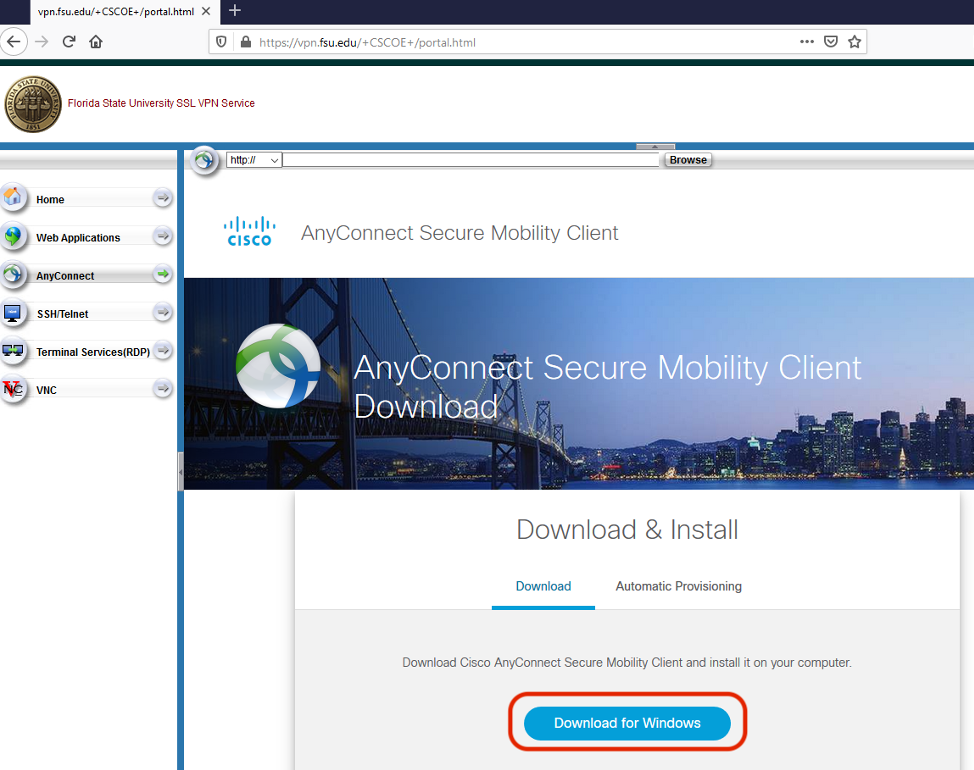
4. You should now see this page. Select Download for Windows.
Note: Follow the instructions for install by clicking the Instructions icon that was clipped from the lower right corner of this image.
5. Once the download is complete, open the downloaded file. This will install the latest AnyConnect.
Note: The installer window will likely appear ‘under’ the current window. If you do not see the installer window when you run the downloaded app, move the current window to reveal it.
Note: Continue below.
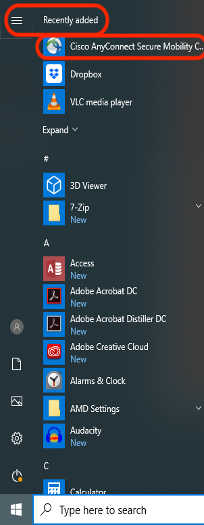
6. Once the install is complete open to the Windows Application list. At the top, under Recently Added you will see Cisco AnyConnect Secure Mobility Client. You may also find it under Cisco or AnyConnect.
7. It will open the window as seen below. Enter your FSU ID, email without ‘@fsu.edu’ and Password.
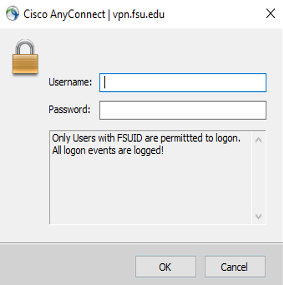
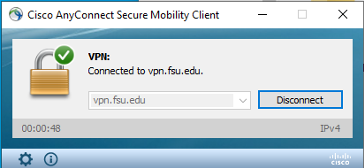
8. When it has accepted your credentials, you will see a like the one below. Enter vpn.fsu.edu then click on Connect. When the connection is accepted you will see a green check mark like the one below on the padlock.
AnyConnect Client Links - by Operating System
To download a client using a link below, you will need to authenticate using your FSUID username and password to the College's SharePoint site.
(NOTE-1: This is in case you have issues with getting the client from https://vpn.fsu.edu/, FSU's VPN page is the primary location you should try and install AnyConnect from)
(NOTE-2: ITS has reported a known issue with OS X Catalina's (10.15) AnyConnect client, you need the newest version which is found below)
- Windows 10 - Operating Systems:
- Apple OS X Mojave (10.14) and older:
- Apple OS X Catalina (10.15):
Related Links - Connecting to on-campus Network Folder/File Shares:
- How to - Connect to Network Folders (Windows OS 7 and 10)
- How to - Connect to Network Folders (Apple OS X)